
Improving cursive handwriting takes regular practice and attention to letter size, slant, spacing, smooth connections, and writing speed. Start with basic cursive strokes, practice difficult letter combinations, use guided lines, and spend around 10 minutes a day writing letters, words, and sentences. Consistent practice can make your cursive handwriting neater, smoother, and easier to read.
Good cursive handwriting does not require hours of practice or naturally artistic handwriting. Most improvements come from correcting a few basic habits and repeating the right movements.
Your letters may look uneven because their sizes change from word to word. Your writing may feel crowded because the spacing is inconsistent. Sometimes individual letters look fine, but the connections between them make the words difficult to read.
The good news is that you can work on these problems one at a time. The following 10 cursive writing tips can help you develop better control, smoother connections, and more consistent handwriting.
Table of Contents
1. Choose One Cursive Style to Follow
Cursive handwriting comes in many styles. Some use large loops and flourishes, while others have simple letterforms designed for everyday writing.
Start with one style that feels comfortable instead of switching between several different alphabets. A consistent reference makes it easier to learn the correct shape, height, slant, and connecting stroke for each letter.
Beginners can start with the Cursive Alphabet A to Z and practice both uppercase and lowercase forms before developing their own style.
You do not need to copy a particular alphabet forever. The goal is to build consistency first. Once the movements become natural, your handwriting can develop its own personality.
2. Fix Your Pen Grip and Writing Position
A relaxed grip gives your hand more freedom to make smooth cursive strokes. Holding the pen too tightly can make your writing feel stiff and can make longer practice sessions uncomfortable.
Sit comfortably and keep your shoulders relaxed. Place your paper at an angle that allows your hand and forearm to move naturally across the page.
No single grip works perfectly for everyone. The important thing is having enough control without putting unnecessary pressure on your fingers.
Try writing one sentence with your normal grip. Then loosen your fingers slightly and write it again. The second version may feel easier and more fluid.
3. Use Lined Paper to Control Letter Height
Lined paper can make cursive handwriting practice much easier because it gives your letters clear boundaries.
The baseline keeps letters sitting at a consistent level. The middle line helps control lowercase letters, while the upper and lower areas guide tall letters and descenders.
For example:
- a, c, e, o stay within the main lowercase area.
- b, d, f, h, k, l, t extend upward.
- g, j, p, q, y extend below the baseline.
If your letters keep changing size, practice on a three-line or guided cursive worksheet. Structured lines can help your hand learn the correct proportions.
Once your letters become more consistent, you can move to ordinary notebook paper.
4. Practice Basic Cursive Strokes Before Full Letters
Cursive letters are built from repeated movements such as curves, loops, under-curves, and over-curves. Practicing these basic strokes first can make complete letters easier to control.
Spend a couple of minutes practicing:
- Ovals
- Loops
- Curves
- Upstrokes
- Downstrokes
- Entry strokes
- Exit strokes
Try simple patterns such as:
oooooo
llllll
eeeeee
mmmmmm
uuuuuu
Keep the movements similar in size and direction. You are training your hand to repeat the same movement without having to think about every stroke.
After practicing the strokes, move into individual letters. Beginners can use the site’s cursive letter worksheets to trace and practice uppercase and lowercase forms.
5. Keep Your Letter Size and Slant Consistent
Letter size and slant have a major effect on how neat your cursive looks.
Imagine writing the word “beautiful.” If the first letters lean strongly to the right and the remaining letters become almost upright, the word can look uneven even if every letter is readable.
Choose a comfortable slant and try to maintain it across a word and sentence.
The same applies to letter size. Your lowercase a should have roughly the same proportions each time you write it. Tall letters should have similar heights, too.
You do not need to measure every letter. Look for a consistent visual pattern.
Try writing:
aaaaaa aaaaaa aaaaaa
Then compare the size and slant of each group. Repeat the exercise with letters that usually look uneven in your handwriting.
6. Practice Difficult Letter Connections
Cursive writing becomes different from print writing because letters connect. A beautifully formed letter can still look awkward if its connection to the next letter is too high, too low, or too tight.
Instead of practicing the entire alphabet repeatedly, focus on the combinations you actually find difficult.
Try:
- ar
- er
- re
- st
- th
- ch
- ow
- fr
- rn
- mn
For example, if rn often looks like m, practice:
rn rn rn rn
Then move into words:
learnturnaround
The cursive joining letters worksheets can help you practice common joins and build smoother connections between individual letters.
Focus on the entry and exit strokes rather than simply trying to write faster.
7. Improve Spacing Between Letters and Words
Even beautiful cursive can become difficult to read when the spacing is inconsistent.
Look at two areas:
Letter spacing: Are letters packed too closely together?
Word spacing: Is there enough space to clearly separate one word from the next?
Try writing:
The little bird flew over the garden.
Now write it again while paying attention to the spaces between words.
Good cursive does not mean every letter has to be squeezed tightly together. Connected writing should still have enough visual space for each letter to remain recognizable.
A useful goal is to create a steady rhythm. The gaps between words should generally be larger than the gaps between connected letters.
8. Slow Down First, Then Build Your Natural Speed
One of the easiest ways to improve cursive handwriting is to slow down during practice.
A slower pace gives you enough time to form each letter correctly and notice problems with spacing or connections.
However, you do not need to write extremely slowly forever.
Use three stages:
Practice slowly: Focus on correct letter formation.
Increase your pace: Focus on smooth connections.
Write naturally: Check whether your handwriting stays neat at your normal speed.
For example, if you normally write a sentence in 20 seconds, take around 40 seconds during your first practice attempts. Once the movements feel easier, gradually reduce the time.
This helps you develop both control and natural writing flow.
9. Practice Words and Sentences, Not Just the Alphabet
Writing the alphabet is useful when you are learning letterforms, but real handwriting involves letters working together.
Once you have practiced individual cursive letters, move into words and sentences.
Start with your name. Then choose words that contain the letters or connections you find difficult.
For example, if you are practicing a, r, and e, try:
- area
- rare
- reader
- learn
Then write a complete sentence.
Every morning, I write a few lines in my notebook.
Full sentences reveal problems that individual-letter practice may hide. You can see whether your letter size, spacing, slant, and connections remain consistent across an entire line.
Once you are comfortable with words, continue with [cursive sentences] and gradually move to longer passages.
10. Follow a 10-Minute Daily Cursive Practice Routine
You do not need a long practice session to improve your cursive handwriting. Ten focused minutes can give you enough time to work on the areas that need attention.
Try this routine:
2 minutes — Basic strokes
Practice loops, curves, ovals, and other repeated movements.
2 minutes — Difficult letters
Choose two or three letters that need improvement.
2 minutes — Letter connections
Practice combinations such as th, er, st, rn, or ch.
2 minutes — Words
Write several words using those letters and connections.
2 minutes — Sentences
Finish with a short sentence or paragraph.
Keep the routine short enough that you can repeat it regularly. Consistency matters more than filling several pages in one sitting.
After you become comfortable with sentences, [cursive paragraphs] can help you practice longer stretches of connected writing.
How to Improve Cursive Handwriting in 7 Days
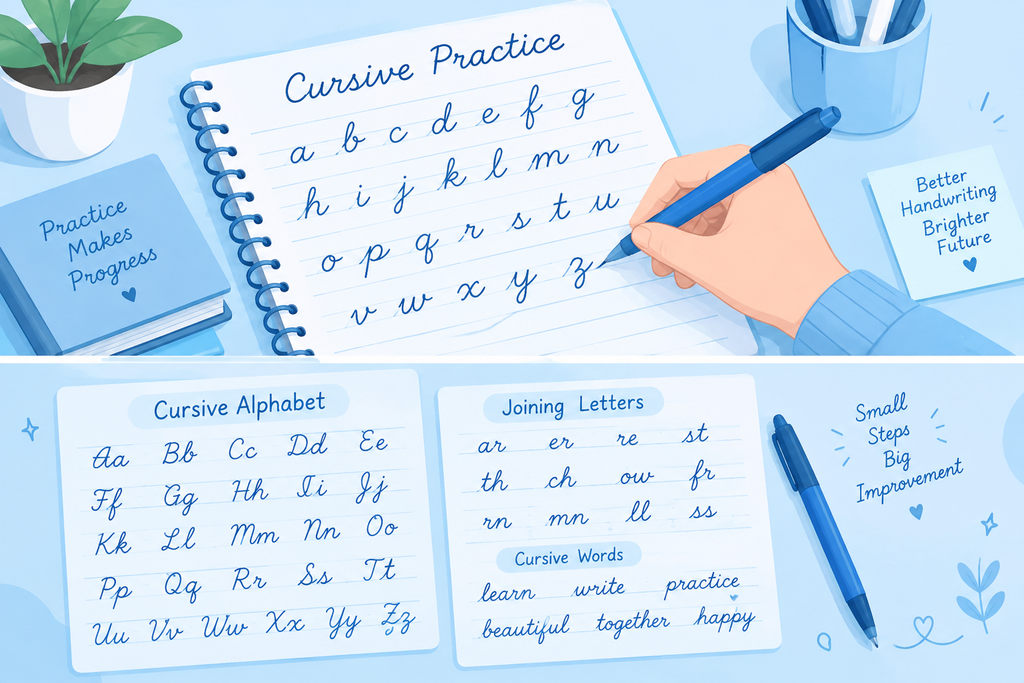
A seven-day practice plan can improve cursive handwriting and make it easier to follow. Instead of wondering what to write each day, give yourself one specific goal.
Day 1: Find Your Weak Areas
Write a short paragraph normally.
Look at:
- Letter size
- Slant
- Spacing
- Baseline
- Connections
- Readability
Choose the two areas that need the most attention.
Day 2: Practice Basic Strokes
Spend 10 minutes practicing curves, loops, ovals, and simple connecting movements.
Focus on repeating the same movement smoothly.
Day 3: Practice Lowercase Cursive Letters
Choose five to eight lowercase letters.
Write each one several times. Then use them in short words.
Pay attention to their size and starting and ending strokes.
Day 4: Practice Letter Connections
Choose the combinations that cause problems in your writing.
For example:
th th th
er er er
st st st
Move from two-letter combinations to complete words.
Day 5: Practice Words and Spacing
Write 10–15 common words.
Focus on the spaces between letters and words. Keep the writing relaxed rather than trying to make every letter decorative.
Day 6: Practice Complete Sentences
Write several sentences at a comfortable pace.
Try to keep your letter size, slant, spacing, and connections consistent from the first word to the last.
Day 7: Compare Your Progress
Write the same paragraph you wrote on Day 1.
Place both samples side by side.
Check:
- Are your letters more consistent?
- Is your spacing better?
- Are the connections smoother?
- Is your writing easier to read?
- Can you write comfortably at a normal pace?
A week of practice can help you notice improvements in control and consistency. Continued practice will help those changes become natural.
Common Cursive Handwriting Mistakes to Avoid
Small habits can affect the appearance of your entire page.
Holding the pen too tightly: A tense hand can make smooth strokes harder.
Changing your slant: Different angles can make words look uneven.
Making letters overly decorative: Extra loops can reduce readability during everyday writing.
Writing too quickly: Speed can lead to incomplete letters and awkward connections.
Ignoring spacing: Crowded letters and uneven word gaps make writing harder to read.
Practicing only individual letters: Real cursive involves connections, words, sentences, and paragraphs.
Changing styles constantly: Switching between different letterforms makes consistency harder to develop.
The goal is not perfect handwriting. Aim for writing that is comfortable, consistent, smooth, and easy to read.
Tips for Left-Handed Cursive Writers
Left-handed writers may need to adjust their paper position and hand movement to find a comfortable writing angle.
Try different paper angles until your hand moves naturally across the page. A quick-drying pen can also help reduce smearing as your hand moves over freshly written words.
Avoid forcing your wrist into an uncomfortable position just to copy someone else’s technique.
The same basic principles still apply: maintain consistent letter size, keep your spacing even, practice smooth connections, and build speed gradually.
How to Know If Your Cursive Handwriting Is Improving
Looking at your handwriting casually can make small changes difficult to notice. A simple scoring system gives you a better way to track progress.
Write the same sentence at the beginning and end of each week. Then score yourself from 1 to 5:
| Area | Score |
|---|---|
| Letter size | /5 |
| Slant | /5 |
| Spacing | /5 |
| Connections | /5 |
| Readability | /5 |
You can also keep your practice pages in a folder and compare them every few weeks.
Do not judge progress only by how decorative your handwriting looks. Better control, smoother connections, more consistent spacing, and easier reading are all signs of improvement.
Cursive Handwriting vs. Calligraphy: What’s the Difference?
Cursive handwriting and calligraphy can look similar, but they have different purposes.
Cursive handwriting is mainly used for practical writing. Letters are often connected so you can write words smoothly and efficiently.
Calligraphy focuses more on artistic lettering. It can involve specialized tools, different stroke widths, decorative forms, and carefully constructed letter shapes.
You do not need expensive calligraphy equipment to improve your everyday cursive. A comfortable pen, suitable paper, and regular practice are enough to get started.
Frequently Asked Questions
How can I improve my cursive handwriting fast?
Focus on the areas that affect readability most: letter size, slant, spacing, and connections. Spend around 10 minutes practicing each day. Start slowly, then gradually increase your writing speed as the movements become more comfortable.
How do I improve my handwriting in 7 days?
Follow a focused seven-day routine. Start by identifying your weak areas, then practice strokes, letters, connections, words, and sentences throughout the week. A week can help you notice improvement, but continued practice is needed to make new writing habits natural.
What are 10 tips to improve handwriting?
Choose one cursive style, improve your grip and writing position, use lined paper, practice basic strokes, keep letter size and slant consistent, work on letter connections, improve spacing, control your writing speed, practice words and sentences, and follow a short daily routine.
How can I make my cursive handwriting neat?
Focus on consistent letter size, a steady slant, even spacing, clear connections, and a stable baseline. Guided worksheets can also help you practice letter formation and proportions.
How long does it take to improve cursive handwriting?
You may notice better control after several focused practice sessions. Larger changes take longer because your hand needs time to become comfortable with new movements. Short, regular practice is usually more useful than occasional long sessions.
What pen is best for practicing cursive?
A comfortable pen with smooth, consistent ink flow is a good starting point. Gel pens, ballpoint pens, and fountain pens can all work. Choose the option that lets you write comfortably without excessive pressure.
Is cursive handwriting the same as calligraphy?
No. Cursive is mainly practical handwriting that often uses connected letters. Calligraphy focuses more on artistic lettering, controlled strokes, and presentation.
Can adults improve their cursive handwriting?
Yes. Adults can learn or improve cursive handwriting through deliberate practice. Start with basic letter formation, then move into connections, words, sentences, and longer passages.
Final Thoughts
Improving cursive handwriting is mostly about small corrections repeated consistently.
Start with your biggest problem. Maybe your letters are uneven, your spacing is crowded, or certain connections look awkward. Spend a few focused minutes working on that area, then apply the improvement to real words and sentences.
The Cursive Alphabet A to Z can help you work on individual letterforms, while cursive joining letters can help you improve connections. Once those basics feel comfortable, move into cursive words, cursive sentences, and finally cursive paragraphs to build longer-form writing practice.
You do not need to make every letter perfect. Neat cursive handwriting is about creating writing that feels comfortable, looks consistent, and stays easy to read.