
Cursive writing can look beautiful, but learning it takes practice. Common cursive writing mistakes include uneven letter size, poor letter formation, messy connections, inconsistent slant, weak spacing, and writing too quickly. The good news is that you do not need to fix everything at once. Find one problem, practice the letters or movements causing it, and then use them in words and sentences.
For example, if your letters keep changing size, start by practicing short letters such as a, c, e, i, and o. If your letters do not connect smoothly, practice simple joins such as an, in, th, and st. Small, focused practice can make cursive handwriting feel much easier.
Table of Contents
How Do You Know Your Cursive Writing Needs Improvement?
Your handwriting does not have to look exactly like a worksheet to be good. Clear, comfortable, and readable handwriting matters more than perfect-looking letters. If you want to improve cursive handwriting, start by checking which parts of your writing need the most practice.
Take a piece of paper and write this sentence:
The quick brown fox jumps over the lazy dog.
Now look at your writing. Ask yourself:
- Are most letters about the same size?
- Do your words stay on the writing line?
- Do the letters lean in a similar direction?
- Are the connections between letters smooth?
- Can another person read your words easily?
- Are there clear spaces between words?
- Did you remember the dots on i and crosses on t?
- Does your handwriting become messy when you write faster?
You may notice one problem more than the others. Start there. Fixing one handwriting problem at a time is easier than trying to change your whole writing style in one practice session.
10 Common Cursive Writing Mistakes and How to Fix Them
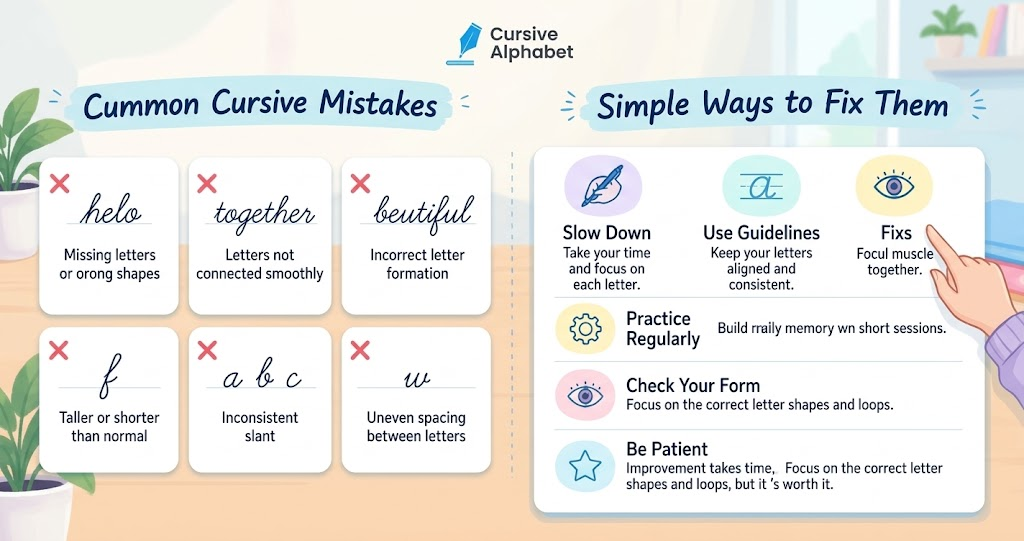
1. Incorrect Cursive Letter Formation
Correct letter formation is the first step toward neat cursive handwriting. A letter can look confusing when you start in the wrong place, use the wrong stroke, or finish it differently each time.
Some cursive letters can feel tricky because they look different from their printed forms. Letters such as a, f, r, s, and z may need extra practice.
For example, if your lowercase r keeps looking like v, slow down and practice the letter on its own before using it in words.
Try this:
r r r r r
Then use it in simple words:
red → run → rabbit → rain
Do not worry about speed yet. Focus on making the same letter shape each time.
If you are still learning individual letters, practice the cursive alphabet before moving into longer words.
2. Inconsistent Letter Size
Cursive looks easier to read when letters have a consistent size. Beginners often make one letter tiny and the next one much taller.
Look at a word such as:
apple
The a, p, p, l, and e should work together as one balanced word. The letters should not jump randomly in size.
Start by practicing short lowercase letters:
a c e i o
Then try simple words:
cake → ice → coat → apple
Tall letters such as b, d, h, k, and l need more height. Letters such as g, j, p, q, and y extend below the baseline.
Lined paper can help you see where each part of the letter should go.
3. Uneven Cursive Slant
Your cursive letters do not need a perfect angle, but keeping a similar slant can make your writing look more consistent.
For example, you may start a sentence with letters leaning slightly forward and then switch to upright letters halfway through the line.
Try writing:
My little dog likes to play.
Look at the letters after you finish. Do they generally lean in the same direction?
If your slant keeps changing, practice short rows of letters instead of full sentences. Keep your paper in one comfortable position and avoid forcing your hand into an uncomfortable angle.
The goal is not to make every letter identical. A steady writing style is more useful than chasing a perfect slant.
4. Broken or Awkward Letter Connections
Good cursive connections help letters flow naturally from one to the next.
A connection can look awkward when it starts too high, drops too low, creates an unwanted loop, or leaves a strange gap between letters.
Start with two-letter combinations instead of whole words:
an
in
on
th
st
er
Write each combination several times.
Then use the joins in real words:
an → hand → sand
th → this → three
st → star → stop
This approach helps you understand how one letter finishes and how the next letter begins.
You can practice more examples using cursive joining letters.
Remember that cursive does not mean keeping your pen on the paper every second. Some letters or writing styles may use a natural pen lift. The goal is a smooth and readable connection, not forcing every letter together.
5. Poor Letter and Word Spacing
Good spacing helps readers tell your letters and words apart.
There are two types of spacing to watch.
Letter spacing refers to the space between letters inside a word. Cursive usually keeps letters close because many of them are connected.
Word spacing is the gap between separate words.
Compare these:
Iliketowrite.
and:
I like to write.
The second sentence is easier to read because the words have clear spaces.
Try writing one short sentence and check the spaces between each word. If your words keep running together, leave a small, consistent gap after each word.
A simple trick is to use the width of your little finger as a rough guide while learning. You can stop using the guide once natural spacing becomes easier.
6. Letters Do Not Stay on the Baseline
Keeping your writing close to the baseline helps your words look organized.
The baseline is the line that most letters sit on when you write on lined paper.
Look at:
The cat is sleeping.
If some letters float high and others drop too low, the sentence can look uneven.
Practice writing a row of simple words on lined paper. Pay attention to where the main part of each lowercase letter sits.
Some letters naturally go below the baseline. These include:
g, j, p, q, y
That is normal. The important thing is to keep the main body of your letters in a consistent position.
7. Loops Are Too Large or Hard to Read
Cursive loops should be clear and controlled, not so large that they change the shape of a letter.
Letters such as b, f, h, k, and l may contain loops or tall strokes depending on the cursive style you are learning.
A loop that becomes too large can make one letter look like another. A loop that is too small or closed can also make a letter difficult to recognize.
Start with simple loop practice:
llllll
Then move to:
ll → all → hill → little
Keep the loops similar in size as you write.
If one letter keeps giving you trouble, practice that letter separately before putting it into a complete sentence.
8. Pressing Too Hard on the Paper
Your pencil or pen should have enough pressure to create clear letters without making your hand work too hard.
Some children press heavily because they want every letter to look dark and strong. Heavy pressure can make writing tiring and can make the strokes look thick.
Try writing the same word twice:
beautiful
First, use your normal pressure. Then write it again while holding the pencil more gently.
Your second version should still be dark enough to read, but your hand should feel more relaxed.
A comfortable grip also matters. Hold the pencil firmly enough to control it, but avoid squeezing it as hard as possible.
9. Writing Too Fast
Writing faster before your letter movements are ready can make cursive messy.
Imagine learning a new dance. You would practice the moves slowly before trying to perform the whole routine quickly. Cursive works in a similar way.
Write this sentence slowly:
I enjoy writing in cursive.
Check your letters and connections.
Then write the same sentence again at your normal speed. Compare both versions.
If the second version becomes much harder to read, slow down a little during practice.
You do not need to write extremely slowly forever. Correct and comfortable movements can become faster naturally as you practice.
10. Mixing Print and Cursive in Confusing Ways
Mixing print and cursive is not automatically a mistake. Many people naturally develop a handwriting style that uses both.
For example, you might write:
- lowercase letters in cursive
- capital letters in print
- numbers in print
- certain difficult letters in a more printed shape
That can be perfectly fine if your writing stays readable.
The problem starts when switching between styles makes a letter difficult to recognize.
For example, if your lowercase r looks completely different every time you write it, choose one comfortable version and practice it consistently.
Your handwriting can have its own personality. You do not need to make every letter look exactly like someone else’s handwriting.
Which Cursive Letters Are Hardest to Write?
Some cursive letters take more practice because their shapes or connections can be confusing.
Common challenging letters include:
a, b, f, r, s, t, and z
Some letters can also look similar when they are written too quickly.
For example:
- a can start looking like o
- r can look like v
- e can become difficult to recognize
- i and u can look similar when their strokes are too close
- n and m can become confusing when their humps are uneven
If one letter keeps causing trouble, do not practice the entire alphabet again. Focus on that letter and the connections it commonly makes.
For example, if r is difficult, practice:
r → ra → re → ri → ro → ru
Then try:
rain → red → ring → rose → run
This gives your hand repeated practice with the same movement while your brain learns to recognize the letter in real words.
How to Find Your Biggest Cursive Writing Mistake
You can find your biggest handwriting problem with a simple self-check.
Write this sentence on lined paper:
The quick brown fox jumps over the lazy dog.
Now check these seven areas:
| Check | What to Look For |
| Letter shape | Can you recognize each letter? |
| Size | Are lowercase letters similar in height? |
| Slant | Do letters generally lean the same way? |
| Connections | Do letters join naturally? |
| Spacing | Can you clearly see each word? |
| Baseline | Do words stay on the writing line? |
| Finishing marks | Are i dots and t crosses clear? |
You can also check how your hand feels.
Does your hand become tired quickly? Do you grip the pencil tightly? Does your writing become much messier when you speed up?
Once you find the biggest problem, practice that one area first.
If your letters are the right size but your connections are messy, you don’t need to spend your whole practice session on letter size.
How to Fix Cursive Writing Mistakes With Practice
The easiest way to improve cursive is to move from simple writing movements to complete writing.
Start with individual letters.
Step 1: Practice letters
Choose three to five letters that need work.
Step 2: Practice joins
Connect two letters:
an, in, th, st
Step 3: Practice words
Use those connections in real words:
thank → stand → inside
Step 4: Practice sentences
Write a short sentence that contains the letters you are working on.
I like to read stories.
Step 5: Practice paragraphs
Once sentences feel comfortable, write several lines without stopping to correct every letter.
You can use cursive words to practice the next stage, then move to cursive sentences and cursive paragraphs.
This progression helps you use handwriting skills in real writing instead of practicing isolated letters forever.
A Simple 15-Minute Cursive Practice Routine
You do not need a long handwriting session to practice effectively. A focused 15-minute routine can give you enough time to work on one specific problem.
2 minutes: Warm-up
Practice simple lines, curves, and loops.
4 minutes: Difficult letters
Choose two or three letters that need improvement.
For example:
r r r r r
s s s s s
3 minutes: Letter connections
Practice combinations such as:
an, th, st, er
3 minutes: Words
Use those connections in simple words.
star → three → rabbit
3 minutes: Sentence
Finish with one short sentence.
The rabbit ran to the garden.
At the end, look at your writing. Pick one thing you did better and one thing to practice tomorrow.
Short, regular practice can be easier to manage than trying to write pages and pages in one sitting.
When Should Parents or Teachers Give Extra Help?
Some cursive writing mistakes are a normal part of learning. Children need time to develop pencil control, letter formation, spacing, and writing fluency.
Extra support can be useful if handwriting problems continue to make everyday writing difficult. For example, a child may regularly struggle to complete schoolwork, find writing uncomfortable, or produce handwriting that others cannot understand even after regular practice.
Parents can start by talking with the child’s teacher about what they are noticing. A teacher can help identify whether the problem is mainly related to letter formation, writing practice, classroom instruction, or something else.
Professional support may also be appropriate when handwriting difficulties are persistent and significantly affect a child’s daily activities.
The goal is not to label a child based on messy handwriting. The goal is to understand the difficulty and find a useful way to support the child.
Frequently Asked Questions
What are the most common cursive writing mistakes?
Cursive writing mistakes include incorrect letter formation, uneven letter size, inconsistent slant, poor connections, weak spacing, baseline problems, heavy pencil pressure, and writing too quickly.
How can I fix messy cursive handwriting?
Find the biggest problem first. Practice the letters or movements causing it, then use them in words and sentences. Slow, regular practice can help you build better control.
Why does my cursive look uneven?
Uneven cursive can come from changing letter size, slant, spacing, baseline position, or letter formation. Check one area at a time to find the main problem.
Why are my cursive letters not connecting properly?
The starting or finishing stroke may need practice. Begin with simple joins such as an, in, th, and st, then use them in words.
How can I make my cursive neater?
Focus on clear letter formation, consistent size, comfortable spacing, and a steady baseline. Work on these skills before trying to increase your writing speed.
Is it okay to mix cursive and print?
Yes. Many people use a mixture of cursive and print. A hybrid handwriting style is fine as long as your writing remains comfortable and easy to read.
How long should I practice cursive each day?
Start with around 10 to 15 minutes of focused practice. Spend most of that time working on your biggest handwriting problem rather than copying large amounts of text.
Final Thoughts
You do not need perfect cursive handwriting to become a good writer. Focus on making your letters clear, keeping a comfortable size and spacing, and connecting letters naturally.
Start with one problem instead of changing everything at once. Practice difficult letters, then use those letters in joins, words, sentences, and paragraphs.
If you are still learning the basics, start with the cursive alphabet. Once individual letters feel comfortable, practice cursive joining letters, then move into words, sentences, and longer writing.
Your handwriting will become more natural as your hand gets used to the movements. Slow, regular practice is more useful than trying to make every letter perfect in one day.